Here we go!
March 27, 2020
After being a mediocre skydiver for a couple years (and an even worse beer drinker), I’ve decided to use all my COVID-19 lockdown free time to take a stab at brewing my own beer. To get some feedback, and hopefully inspire others, I’m chronicling my glorious successes and miserable failures on this site. I hope you enjoy it!
Getting started
After perusing the homebrew dungeon of the internet, I’ve decided to jump into all grain brewing (brewing from base grains instead of buying malt extract) using an electric all-in-one system. While many all grain brewers use three tanks to make their wort (unfermented beer), some are now combining the functions of all three tanks into one system. This seemed easiest and most portable, so I decided to give it a shot.
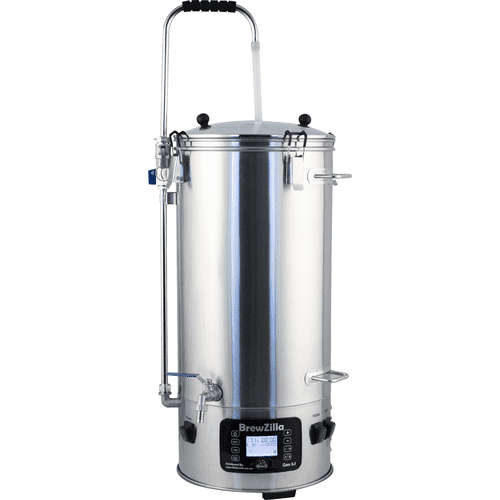
The system I went with is called the RoboBrew 3.1, and honestly, I chose it because it was in stock and it would get here the fastest. It looks awesome, and seems to do everything I need it to do, so I figured I’d go for it and get started as soon as I could rather than waiting for something cooler to come out.
 The RoboBrew 3.1 I bought myself. Thanks for the stimulus check, US Government!
While I was at it, I also picked up a few accessories:
- A wort chiller connection kit (it was free with code ROBOKIT, YMMV)
- The neoprene insulator since I went with the 120V version and I might be brewing in a cold garage
- A whirlpool arm because, why not? Seems like it could come in handy.
- A Hop Spider, which I’ve seen people use in various homebrew YouTube videos. Seems nice for keeping hop debris out of the way.
- 5’ of high-temp silicone tubing which is apparently quite useful for sparging and transferring hot wort. What’s another $10, anyway?
- A mash paddle for stirring and such
If it’s in stock, I’d probably have gone with MoreBeer’s Premium Electric All Grain Brewing System given that it comes with everything you’d need and would have saved me a few hundred bucks.
All the other stuff
I wish it was as easy as just buying my RoboBrew and going to down, but between racking (moving wort/beer around), fermenting, and bottling, it seems like I’ll need a lot more stuff. Here’s some of the things I ordered to get me started. If I missed anything I needed during my first brew day, I’ll update this post accordingly.
Fermenting
I decided to go with an air-tight fermentor to be a little more versatile, in case I needed to store my beer or something after it was done with primary fermentation without having to worry about oxygen getting in. A bucket with lid and airlock are probably fine as long as your yeast are making carbon dioxide, but after they’re done I’d personally be a little worried about oxygen diffusing in. That being said, tons of people just use regular buckets.
Here are the supplies I got for fermenting:
-
FerMonster 7 gal carboy with spigot (x2) - I went with two of these so I could ferment in one and be able to take hygrometer readings through the spigot, with a second one to rack into for secondary fermentation/bottling. I also picked up a few accessories:
- Solid lid for longer-term storage/sloshing around cleaning solution.
- Lid o-ring as a spare (also it seems like the extra lid doesn’t come with one, so I’ll update accordingly)
- An airlock and cork which you’ll need for fermenting. I also picked up a few feet of 1/2” tubing which you can stick in the airlock to make a blow-off tube
- Fermometer thermometer stickers
- A mesh bag for dry hopping to keep things relatively clean
I’m also far too much of a perfectionist to just find a spot in my basement that’s “the right temperature” and instead opted to build my own fermentation chamber. I’m using an old chest freezer I had laying around, and bought a small 200-watt personal heater to use as a heat source and a Wi-Fi enabled temperature controller. From what I’ve seen, all I need to do is plug the freezer into the “cool” side of the controller and the heater into the “heat” side, and put the heater and temperature probe in reasonable places within the freezer. I’ll post another update once I’ve finished building it though!
FYI, if you’re actually on a dropzone, I recommend using something like the BrewJacket, which lets you control your fermentation temperature without having to build a huge fermentation chamber. You’ll need one for each fermentor, but they look super cool and very portable!
[The BrewJacket temperature control system](https://amzn.to/3ariNNB)
Bottling
I would really love to keg, but I figured the $1000 or so I dropped without buying kegging supplies and a kegerator was plenty for now. I’ll write up a post when I get around to building a kegerator. For now though, I grabbed a couple bottling supplies:
- A bottle filler that should fit nicely on the end of my FerMonster’s spigot.
- A fancy bottle capper that’s apparently made by Ferrari. Didn’t realize they made bottle cappers along with their supercars, but seems cool.
- A bunch of oxygen absorbing bottle caps, literally the cheapest I could find. I bought a bunch.
- Some corn sugar (dextrose) to use as priming sugar for bottle carbonation. I got 5 lbs, seems like plenty.
What I didn’t get are empty bottles. I just felt too silly buying empty beer bottles when I could just, well, buy them full at the grocery store, drink them, clean them, and reuse them. I hear Sam Adams bottles work well, but I’ll be sure to share my experiences here.
Cleaning Supplies
They say 90% of brewing is cleaning. Honestly, I love cleaning dishes so I’m hyped to get all my brewing equipment sanitized and sparkling. Here’s what I picked up:
-
Some Star San Sanitizer and Five Star PBW Cleaner which people seem to swear by.
- There are other cleaners like One Step Cleaner and Sanitizer that clean and sanitize in, well, one step.
- Some intense gloves that will reach to my elbows
- A bottle brush and a beer line brush
Other than those things I plan to use stuff I have around my house to help clean, like sponges and buckets. I’d say be sure to have plenty of cleaning stuff on hand.
Other stuff
I also picked up a few other things for weighing, racking, and creating yeast starters. Also, if you don’t have an Amazon Prime account to buy things off Amazon, you can get a free 30 day trial.
- A small 500g/0.01g scale for weighing hops, sugars, and water conditioning chemicals.
- A larger 55lb/0.1oz postage scale for measuring grains.
- A one gallon FerMonster carboy for harvesting yeast and making yeast starters
- Some half-gallon mason jars and pint mason jars for harvested yeast cultures and other random tasks.
- A pound of dried malt extract to make yeast starter wort.
- A hygrometer and hygrometer jar for taking gravity readings
- An Easy Siphon and some tubing for racking beer
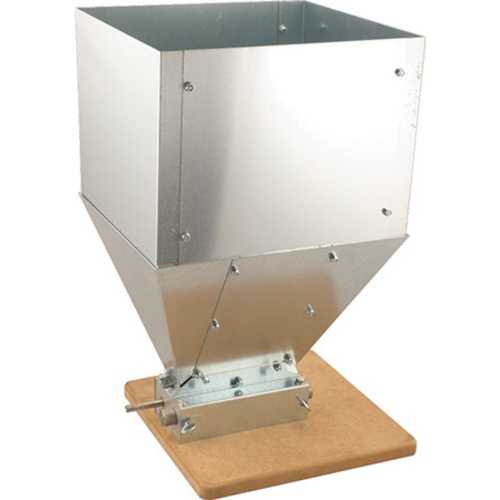
I haven’t pulled the trigger on this one yet, but I plan to get a Monster Mill MM3 for milling my own grain, so I can buy larger quantities and keep it unmilled at home to extend its shelf life.
 The [Monster Mill 3 roller mill](https://www.morebeer.com/products/monster-mill-mm3-grain-complete-packages.html), with the base and hopper. Soon!
And that’s it! All in, I spent just under a grand. A pretty hefty first investment, but I’m super excited to try out some brews, and I hope you get to try them someday too! I plan on blogging about my brew days, sharing my recipes, and generally sharing info for home brewers and beer drinkers alike. I hope you’ll join me!
